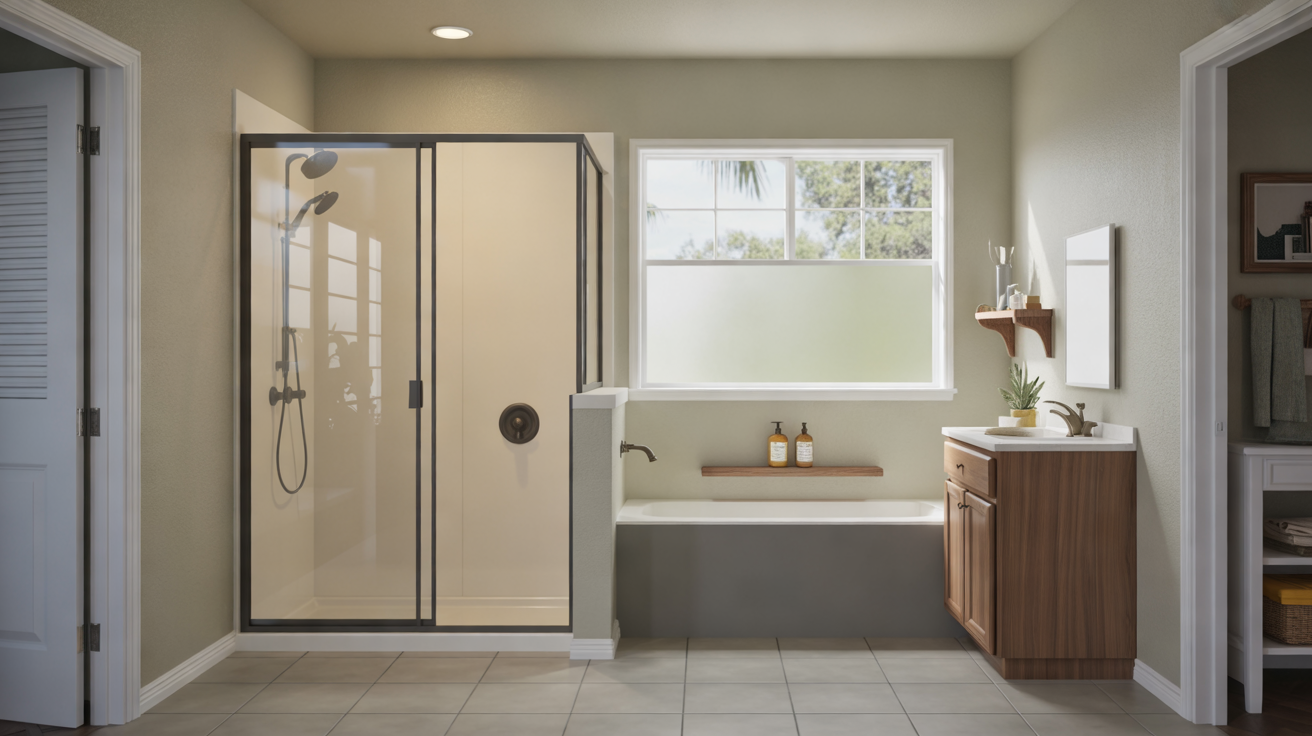
Converting a bathtub into a shower is one of the most effective ways to modernize a bathroom, open up floor space, and make daily routines safer and more convenient. This guide walks you through what a tub-to-shower conversion involves in Cape Coral, common options and materials, and how to decide whether it is the right choice for your home.
What Is a Bathtub to Shower Conversion?
A bathtub to shower conversion replaces an existing tub with a dedicated shower area. In most homes, this means removing the tub, modifying plumbing, installing a shower pan or base, building or re-tiling the walls, and adding doors, fixtures, and storage.
Conversions can range from simple swaps using prefabricated shower systems to fully custom walk-in showers designed to fit your space and style.
Why Convert a Tub to a Shower?
Homeowners in Cape Coral often choose a tub-to-shower conversion for a mix of comfort, safety, and style reasons:
- Ease of access: Stepping over a high tub wall can be difficult for seniors, kids, or anyone with limited mobility. A low-threshold or barrier-free shower minimizes tripping hazards.
- More usable space: Showers typically feel more open than standard tubs, especially in smaller bathrooms.
- Modern look: Conversions allow you to update tile, fixtures, and glass for a more contemporary, spa-like design.
- Everyday practicality: If your household mostly showers, a dedicated shower can better match your habits.
- Easier cleaning: Many modern shower systems use smooth, low-grout surfaces that are quicker to wipe down.
To learn how a shower update can affect resale, see Shower Replacement and Home Resale Value.
Key Decisions for a Tub-to-Shower Conversion
1. Keeping a Bathtub Somewhere in the Home
Before removing your only tub, consider who uses your home now and who might in the future. Many buyers like having at least one bathtub, especially families with young children. If your home has multiple bathrooms, converting a single tub to a shower is usually less of a concern.
2. Shower Layout and Size
Most conversions reuse the footprint of the existing tub alcove, but you still have layout choices:
- Standard alcove shower: Fits in the same 60-inch space as the old tub, with three surrounding walls.
- Walk-in shower: May extend the footprint or remove a wall for a more open feel.
- Corner shower: Sometimes used in small bathrooms to free up floor area.
To explore options for compact spaces, see Shower Replacement for Small Bathrooms.
3. Threshold Height and Accessibility
You can choose from:
- Standard curb: A small step into the shower; common and budget-friendly.
- Low-threshold: Lower curb for easier entry, ideal for aging-in-place.
- Barrier-free (curbless): Floor is flush from bathroom into shower; best for wheelchairs and walkers.
For more on accessible designs, visit Low-Threshold and Barrier-Free Shower Options and Senior-Friendly and Accessible Shower Designs.
4. Wall Materials: Tile vs. Acrylic and Other Options
Wall surface affects both appearance and maintenance needs.
- Tile: Classic, highly customizable look with many colors and patterns. Requires grout maintenance and careful installation to avoid leaks.
- Acrylic or composite panels: Large panels with minimal seams, easier to clean, available in smooth or tile-look finishes.
For a deeper comparison, see Tile vs Acrylic Shower Walls Comparison.
Basic Steps in a Bathtub to Shower Conversion
Exact steps depend on your bathroom and the system chosen, but most conversions include:
- Planning and measuring
Assess existing plumbing, measure the tub area, and select your shower base, wall materials, storage, and fixtures. - Protecting nearby areas
Cover floors and fixtures, and plan for dust and debris control. For preparation tips, read Preparing Your Bathroom for Shower Replacement. - Removing the old bathtub
Turn off water, disconnect the drain, cut away caulk, and carefully remove the tub and any surrounding wall material that needs replacement. - Inspecting for water damage
Check framing, subfloor, and plumbing for rot, mold, or leaks and repair them before installing the new shower. See Water-Damage and Mold Repair Before Shower Replacement for more detail. - Plumbing adjustments
Reposition the drain if needed, and set the shower valve and showerhead height to comfortable positions. - Installing the shower pan or base
Set the base level, connect the drain, and ensure proper slope to avoid standing water. For more on base options and costs, visit Shower Pan Replacement: Materials and Costs. - Building and finishing walls
Install backer board, then tile or wall panels. Proper waterproofing is critical at this stage. - Adding doors or curtains
Choose between glass doors and a curtain based on budget, privacy, and style. For guidance, see Shower Doors vs Shower Curtains. - Installing fixtures and accessories
Add the showerhead, valve trim, grab bars, seating, niches, and shelving. - Caulking, sealing, and testing
Seal joints, allow proper cure time, and test the shower for leaks and good drainage before regular use.
Storage, Seating, and Safety Features
Thoughtful accessories can make a new shower much more comfortable and functional:
- Built-in niches and shelves: Keep soap and bottles off the floor and reduce clutter.
- Grab bars: Improve stability when entering or exiting, especially in low-threshold and curbless designs.
- Shower benches or fold-down seats: Offer a safe place to sit while showering or shaving.
- Non-slip flooring: Textured bases or slip-resistant tile help reduce fall risk.
For more storage inspiration, see Best Shower Storage and Niche Ideas. For floor options, visit Non-Slip Flooring Options for Shower Areas.
DIY vs. Professional Tub-to-Shower Conversion
Some homeowners consider handling a conversion on their own, especially with prefabricated shower kits. However, a conversion blends demolition, plumbing, waterproofing, and finish work—areas where mistakes can lead to leaks and costly repairs.
Key points to weigh:
- Skill level: Experienced DIYers may handle portions like demolition or painting, while leaving plumbing and waterproofing to a pro.
- Time: Professional teams often complete conversions faster and with less disruption.
- Warranty: Professional installations may include workmanship or product warranties.
For more detail on this decision, see DIY vs Professional Shower Replacement and Shower Replacement Warranties and Guarantees. When choosing a local installer, you may find Shower Replacement Near Me: How to Choose a Contractor helpful.
Costs, Timelines, and Financing
Conversion cost depends on materials, plumbing changes, wall finishes, and whether you choose a custom or prefabricated system. Labor is often a significant portion of the budget, especially when structural or plumbing changes are needed.
To understand price ranges in more detail, visit the Shower Replacement Cost Guide and the page on Financing Options for Shower Replacement.
Many tub-to-shower projects can be completed relatively quickly, especially when using one of the Types of Shower Replacement Systems designed for efficient installation. For timing expectations, see How Long Does a Shower Replacement Take? and One-Day Shower Replacement: What to Expect.
Keeping Your New Shower in Great Shape
A well-installed shower should last for many years when cared for properly. Use non-abrasive cleaners, avoid harsh chemicals on glass and fixtures, and keep grout and caulk in good condition. Address any signs of leaks promptly.
For a full maintenance checklist, visit How to Maintain Your New Shower.
FAQs About Bathtub to Shower Conversions
Will removing a bathtub hurt my home’s resale value?
Many buyers appreciate a modern, accessible shower. However, if your home has only one bathroom, some buyers may prefer that you keep at least one tub. In homes with multiple bathrooms, converting one tub to a shower is generally more market-friendly.
Can a tub-to-shower conversion be done in one day?
Some systems are designed for one-day installation, especially when the existing layout and plumbing are straightforward. More complex projects that move plumbing or use custom tile typically take longer.
Is a walk-in shower safe for seniors?
Yes, especially when combined with a low or barrier-free threshold, grab bars, non-slip flooring, and seating. Designing with accessibility in mind can improve comfort and safety for all ages.
How do I choose fixtures and finishes?
Consider durability, ease of cleaning, and water efficiency. Coordinating finishes (such as brushed nickel or chrome) across the valve, showerhead, and accessories creates a unified look. For more upgrade ideas, see Upgrading Shower Fixtures During Replacement and Custom Shower Replacement Design Ideas.
Where can I learn more?
For more articles on shower projects in Cape Coral, visit the Blog or explore Shower Replacement FAQs. To learn about the company behind this site, see the About page, or reach out through the Contact page.